
| NOTE: this
page contains a lot of graphics.
I have made 'thumbnails' of most images. Click on an image to see the full size one. |
1. 1995
Here is the building once it is four logs high:
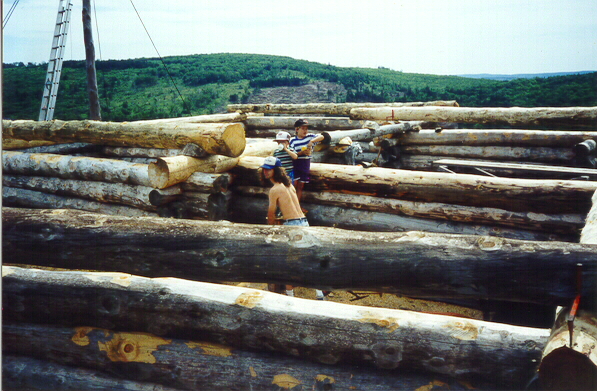
2. 1995
Finally a picture of construction! There's our two children, Karen & Joshua,
as well as my brother Oliver.
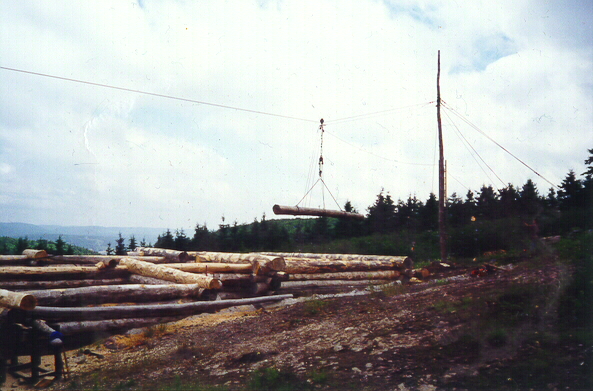
3. 1995
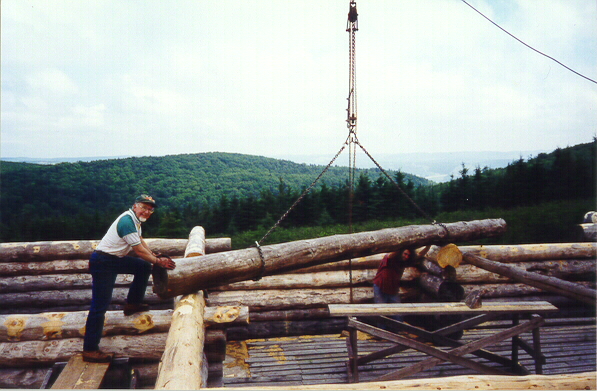
We had to make a rigging (made of two 25 foot tall tree trunks with steel cables and guy wires)
to lift and position the logs. Since the system
is on a hill, the logs are rolled down to the top of the site, and once
on the tackle, they slide downwards fairly easily. The tractor winch is
used to lift the logs up in the air at the top end of the site.
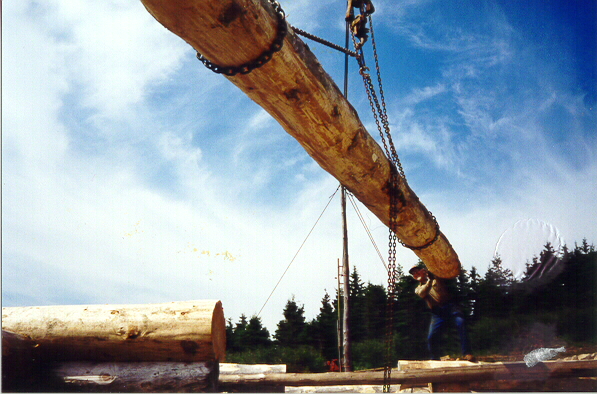
4. 1995
This picture shows you the size of the logs. (Unfortunately
the photo got something spilled on it!)
Here you can see Dad with the chain hoist that is used to lower the
logs in place. The only power tools we used are an old tractor with a winch,
a chain saw, and an electric planer.
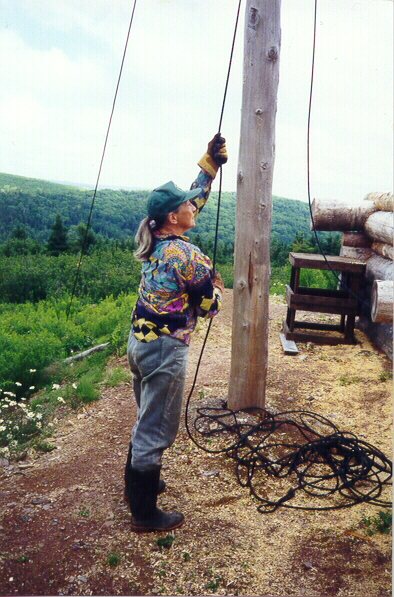 5. Here is the other partner in the construction:
my Mom. As the logs were slid along the pulley system, someone had to be
at each end controlling the position of the log.
5. Here is the other partner in the construction:
my Mom. As the logs were slid along the pulley system, someone had to be
at each end controlling the position of the log.
6. 1995
Once the log was in position and oriented correctly, it was scribed, then
the notches and main groove underneath were cut with a chainsaw. It helps
to have a lot of able-bodied relatives and friends when you undertake a project like
this.
7. Autumn 1995
Working extremely hard, my relatives completed the first story and put on the logs and planking for the ceiling. In the foreground you can see the carport (like a garage, but with no garage door). A woodshed was later added on behind it - up to where the ladder is.
All of this happened in one year!
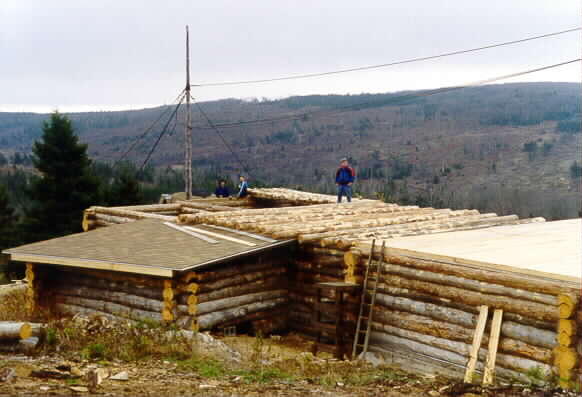
 8. Winter -- 1995/1996
The wooden roof was almost finished by now. Pre-assembled cathedral trusses were purchased
and planking put over them. Running out of time before winter, my parents had to cover
the roof with sheets of plastic to keep the snow out.
9. August 1996.
This is the lower end of the house. You can orient yourself by noting the position of the flag pole in various pictures. Windows and doors are only cut into the logs once the whole wall is built. Until then you have to climb over the walls each time you want to go from one place to another.

10. August 1996
Here is the house -- more or less finished (a project like this is
never really finished). The first winter was freezing as powerful winds from
the south blew in through the tiniest cracks. (The north side of the house is
protected by the hill.) My parents only had one wood stove
at the east end of the house. This photo was taken from the top of the Dome.
Mom and Dad moved into the house in October 1996.
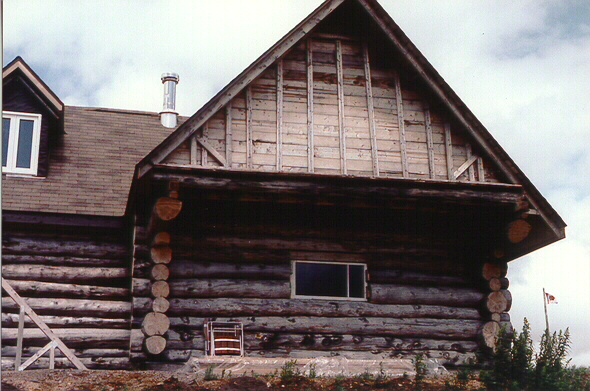
11. Winter 1996/97
Note that the gray mould has been laboriously sanded off the bottom
3 logs. They are then treated with two coats of some borax/boron solution
(insect repellent??) and then two coats of honey coloured Lifeline Exterior Sealant.
12. 1997
Here is the inside of the house once the logs have
been cleaned and protected. (As of July 1998 there are still a couple of walls that need sanding
and sealing.)
Some rooms are panelled with fibreglass insulation behind the panelling as the cold will
come in through any small crack (in spite of caulking on the inside and outside).

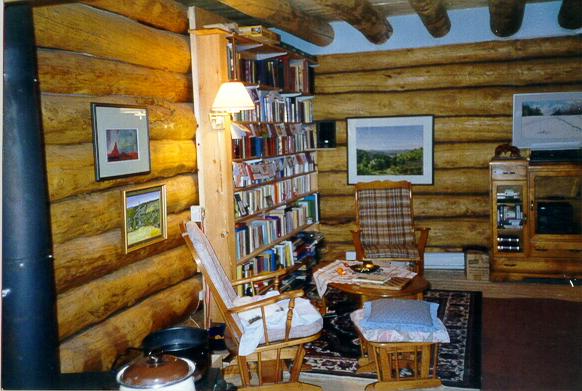
13. August 1998 Here you can see the dining room and the living room. (That's a visiting friend of ours running around!) The center support post is actually vertical (the camera is not) and is needed because one of the ceiling logs had to be cut to make room for the stairs which are not in yet.

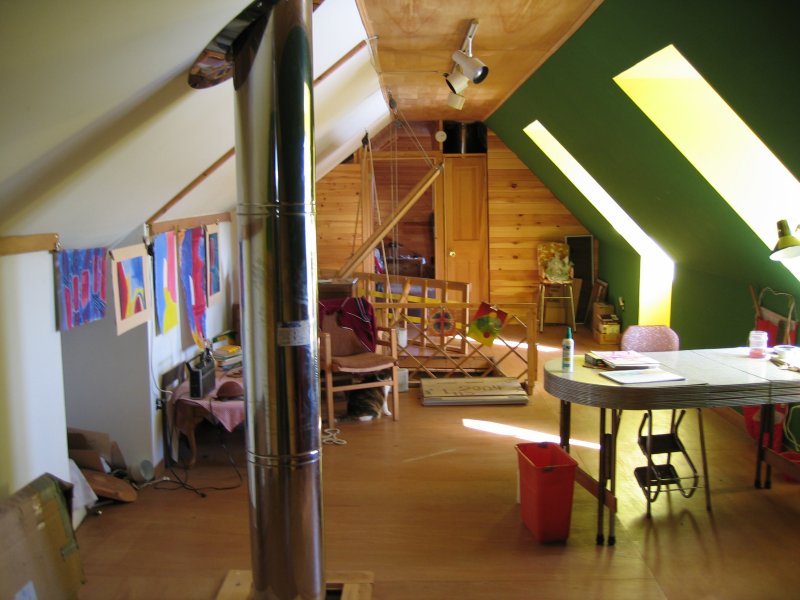
14. August 1998 This is the attic as we were working on it this summer. This photo is taken from above the main bedroom looking towards the lounge. Light is being let in through the two windows at the right. You can see the pink fibreglass insulation under the planking. The floor joists are set on top of the logs (with chocks under them to keep them level when the logs are not). The opening for the stairs is behind the insulated woodstove chimney (middle left side). The woodstove is too far to the left to be seen in the previous photo.
In the foreground are styrofoam sheets for insulating the roof. This is done in such a way as to allow air to flow between the insulation and roof so that moisture doesn't build up. The attic will be used mainly as a painting studio for my mother.
15. February 2006. This is the finished attic (1/3 of it). Nice and cosy. There is a room at each end as well (at right angles -- see the plans on the next page) which are used for spare bedrooms.
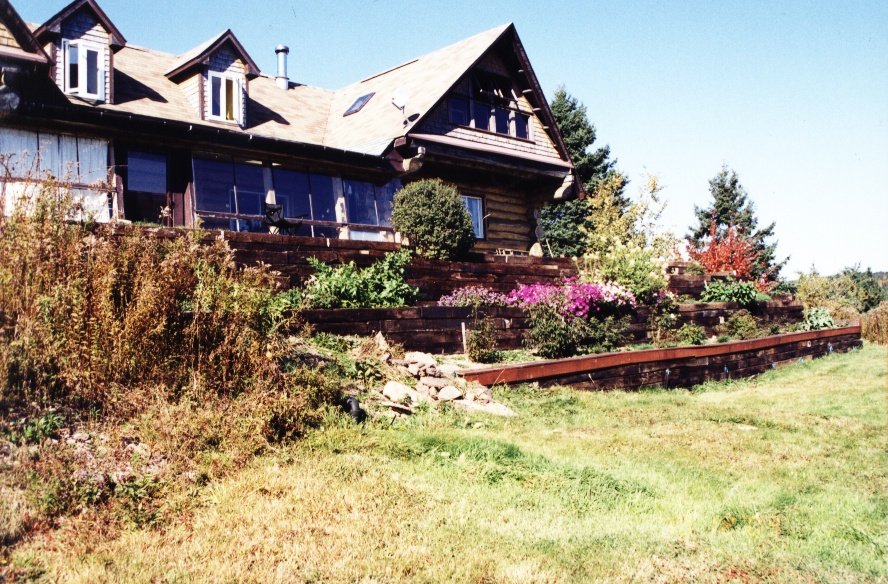
16. Summer 2003 A beautiful house with a lovely garden. You can also see the sun porch with the log wall in bahind the glass.
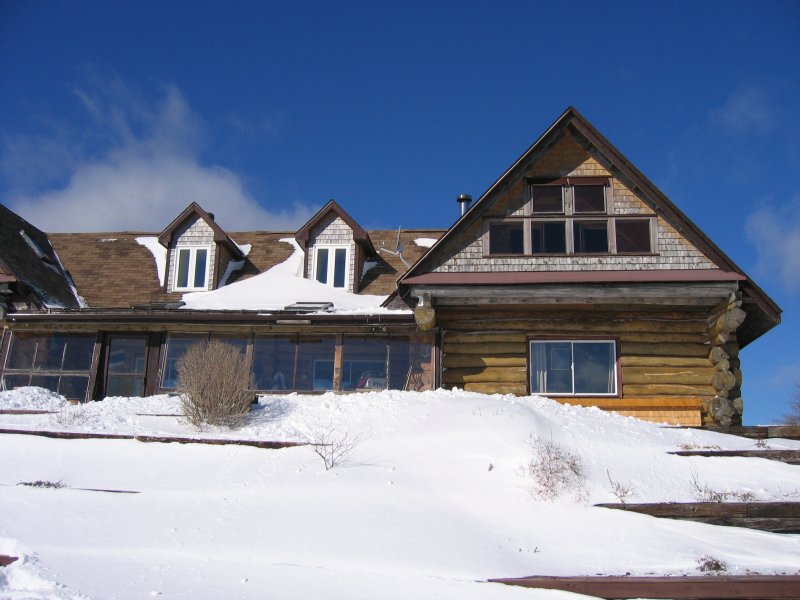
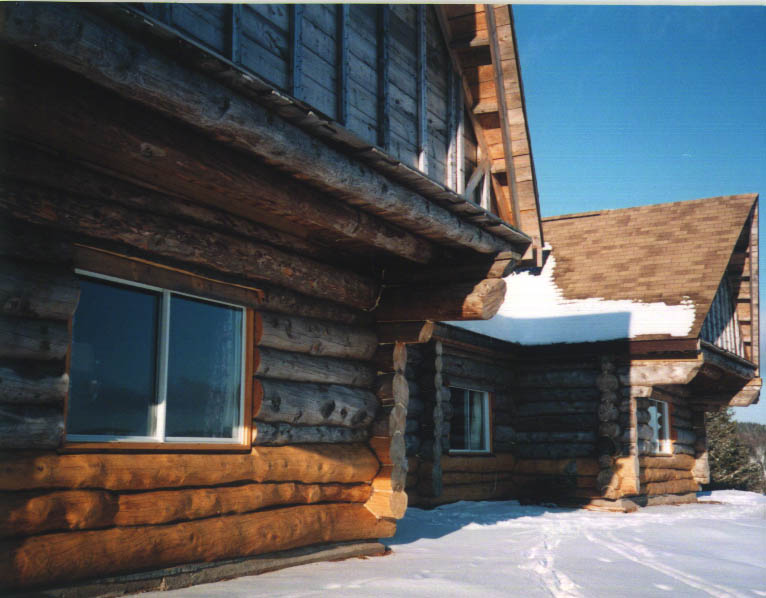
17. February 2006. The log house in winter.
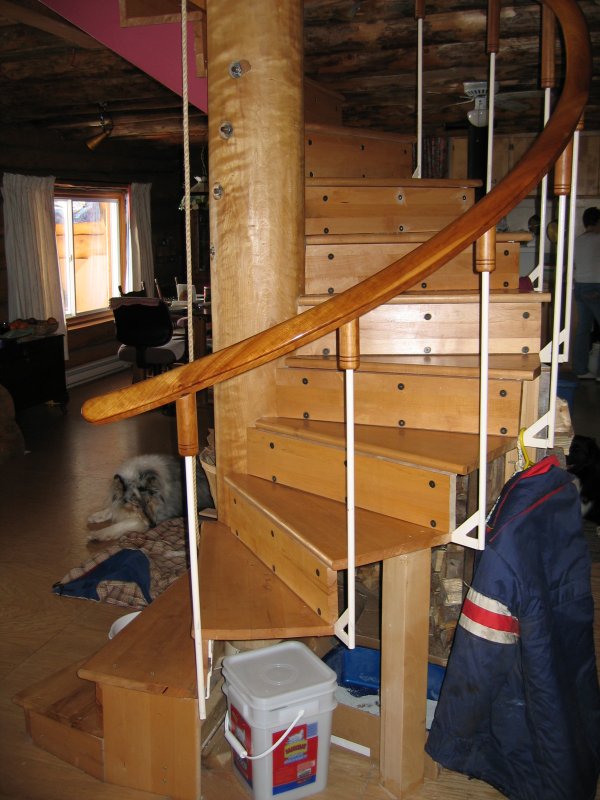
18. February 2006. The spiral staircase.
 |
 |
<< The final page has interesting technical information and schematics. >>