
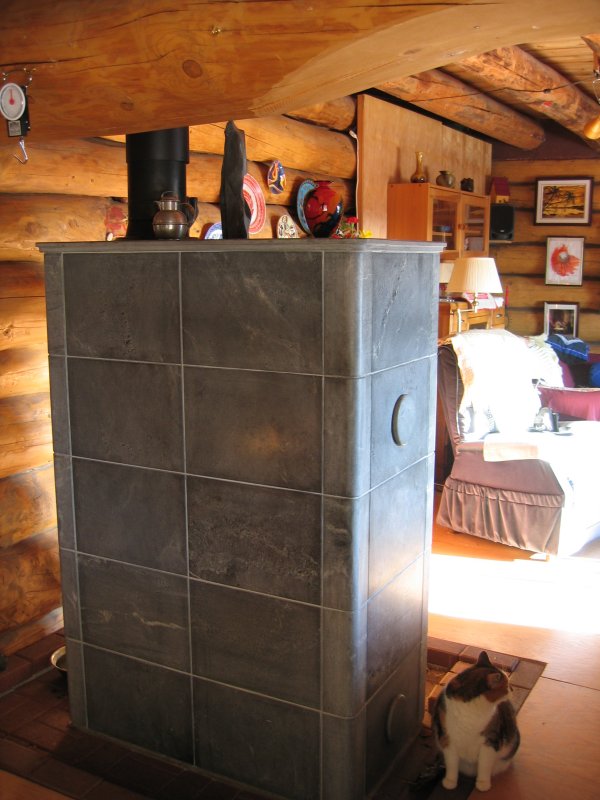
We replaced the woodstove in the lounge/living room with a Tulikivi. This is a special type of woodstove from Finland made of special types of soapstone cut in special ways with the grain of the stone oriented in specific ways. It uses a very small amount of hardwood (10 kg max) which burns hot and fast. The heat is absorbed by the stone. It releases it gradually over a 10 hour period. You just fire it up once in the morning and once in the evening and it keeps the whole room warm. (The object on top of the left photo is a carving in front of the chimney.) The Tulikivi weighs about 1 ton and must be built on a concrete base.
Tulikivi webpage: http://www.tulikivi.com/index.html
, also an interesting graph.
More info: http://www.soapstoneheating.com/tulikivi.htm
|
|
Statistics
Schematic Diagram
The lengths and positions of the logs are the only things that are
to scale.
Tree Harvesting
The selected spruce trees were ringed in winter (January) - 6 inches
of bark was removed at the base of the tree. In June the trees were felled,
branches cut off and the tree dragged out of the forest.
Normally, the bark was peeled off the logs in the same year (June -
October). Some logs which were left with the bark on were eaten through
by bugs. We had to chop them up for firewood.
Wall Construction
The logs provide the insulation against the cold (and heat). Sphagnum moss and caulking
prevent wind from blowing through cracks, although the logs were shaped carefully so that they
fit together well. (The gap between the logs in the diagram is exaggerated).
On the Northern walls of the bathroom and study there is also fibreglass insulation with 1/2"
panelling over it.
Tools Used
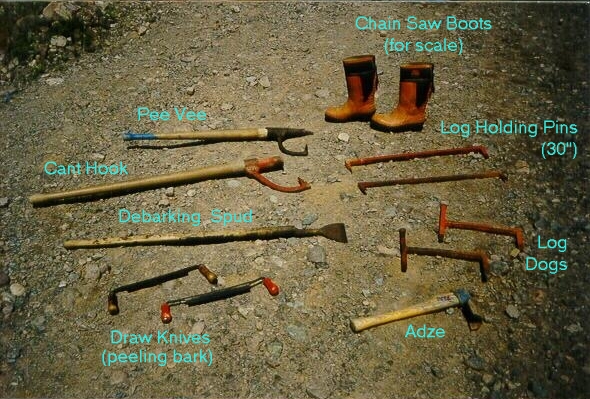
Here are the main log handling and working tools. Most of them are the old traditional logging
tools.
The log dogs are to stop logs rolling off of the building. The adze was going
to be used for cutting grooves in the logs, but it didn't work well. We used a chain saw instead.
The chain saw and the handheld electric sander are not shown in the photo.
Floor Construction
The floor was made by logs lying across the foundation walls (also supported in the centre by
concrete). Any drains needed were put in below the floor first.
The logs were levelled and rough planking laid level on top. Wooden beams (2" x 4")
were laid on edge on top of these planks. Styrofoam insulation (1.5" thick) was laid between the
joists, leaving an air space of about 2" on top of the styrofoam. Any wiring was installed
beneath the styrofoam. Tongue and groove planking was put on top of the two-by-fours. This
planking had stood and dried for a year, but it still shrunk!
Learning from our mistakes:
Prepare the logs ahead of time. Build the house in one year and get
a roof on so that rain and snow don't cause the logs to deteriorate.
My Dad will have to replace three of the bottom logs
over the next 2 - 5 years because the building was left with just one or two layers
of logs for a couple of years (until we had time to work on the loghouse more).
He is planning to cut out sections of the bottom logs and put sections
of new logs in their place and work all around the base this way.